Theme Settings
Theme Settings change the colours of the 3D view: its background, the colour of the geometry in plot mode, and the text drawn over it. Use them when the plant, grades or labels are hard to see against the default colours.
Saving views of the 3D window, and leaving comments, are covered in Project Status, Views & Comments.
Opening Theme Settings
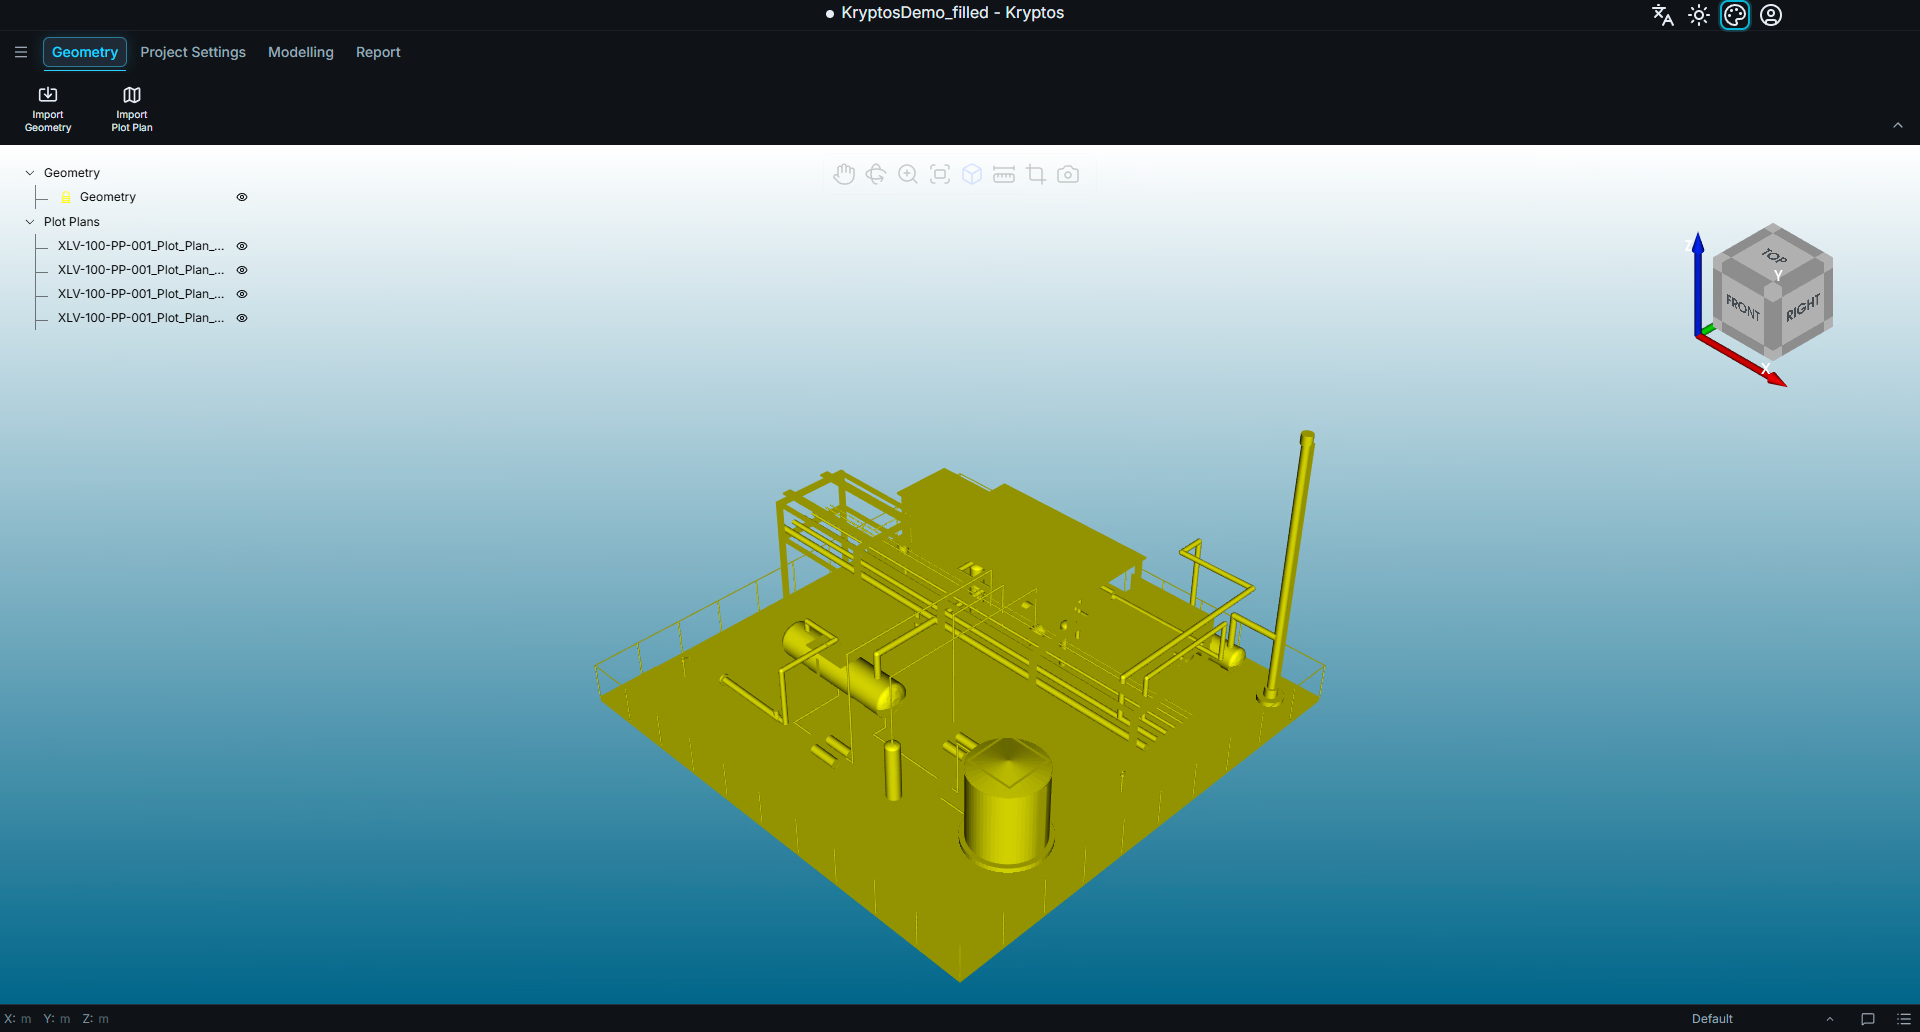
Click the palette icon in the title bar, at the top right of the window. It is there on every screen.
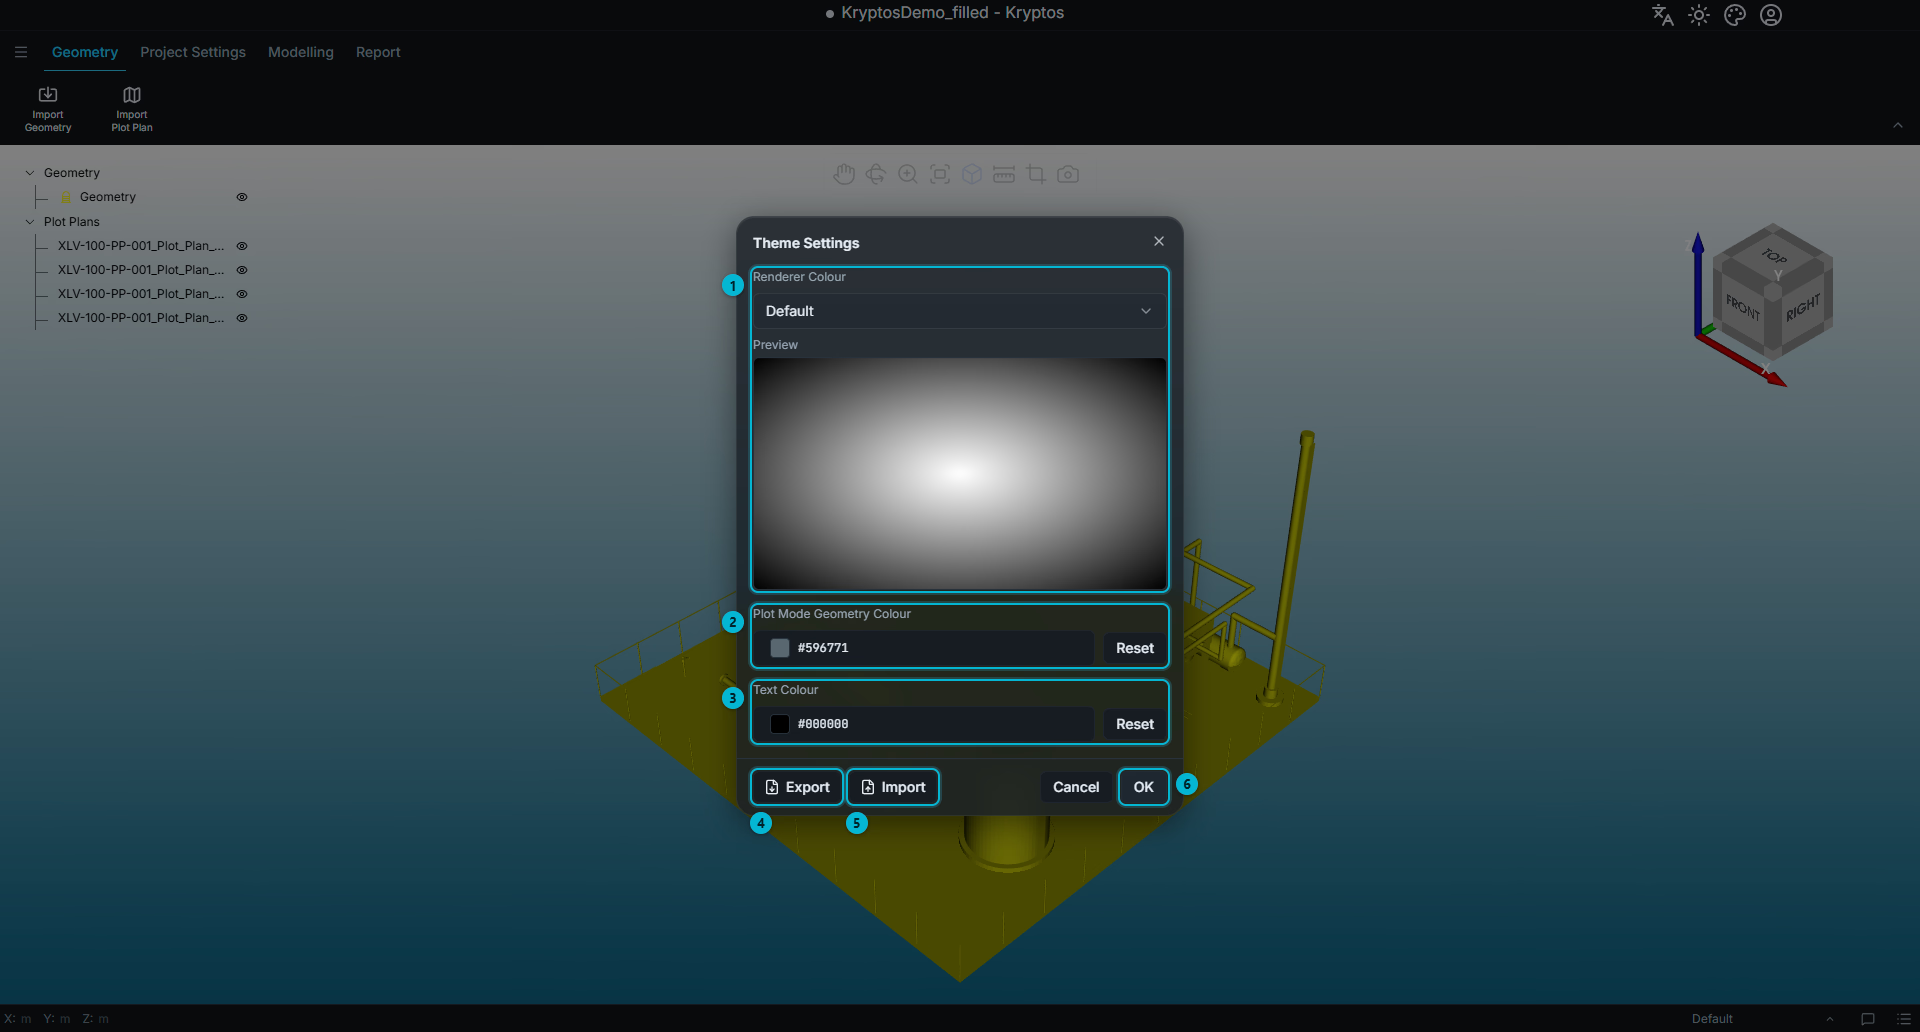
- Renderer Colour — the background of the 3D view, with a Preview that shows how it will look.
- Plot Mode Geometry Colour — the colour of the geometry while you are in plot mode.
- Text Colour — the colour of the text shown over the 3D view.
- Export — saves your colours to a file.
- Import — loads colours from a file.
- OK — applies the colours and saves them.
Renderer Colour
The Renderer Colour list has two choices.
Default is the standard background: white in the centre, fading to black at the corners.
Custom lets you choose the colours yourself. It starts with one solid colour. Click the colour button to pick it.
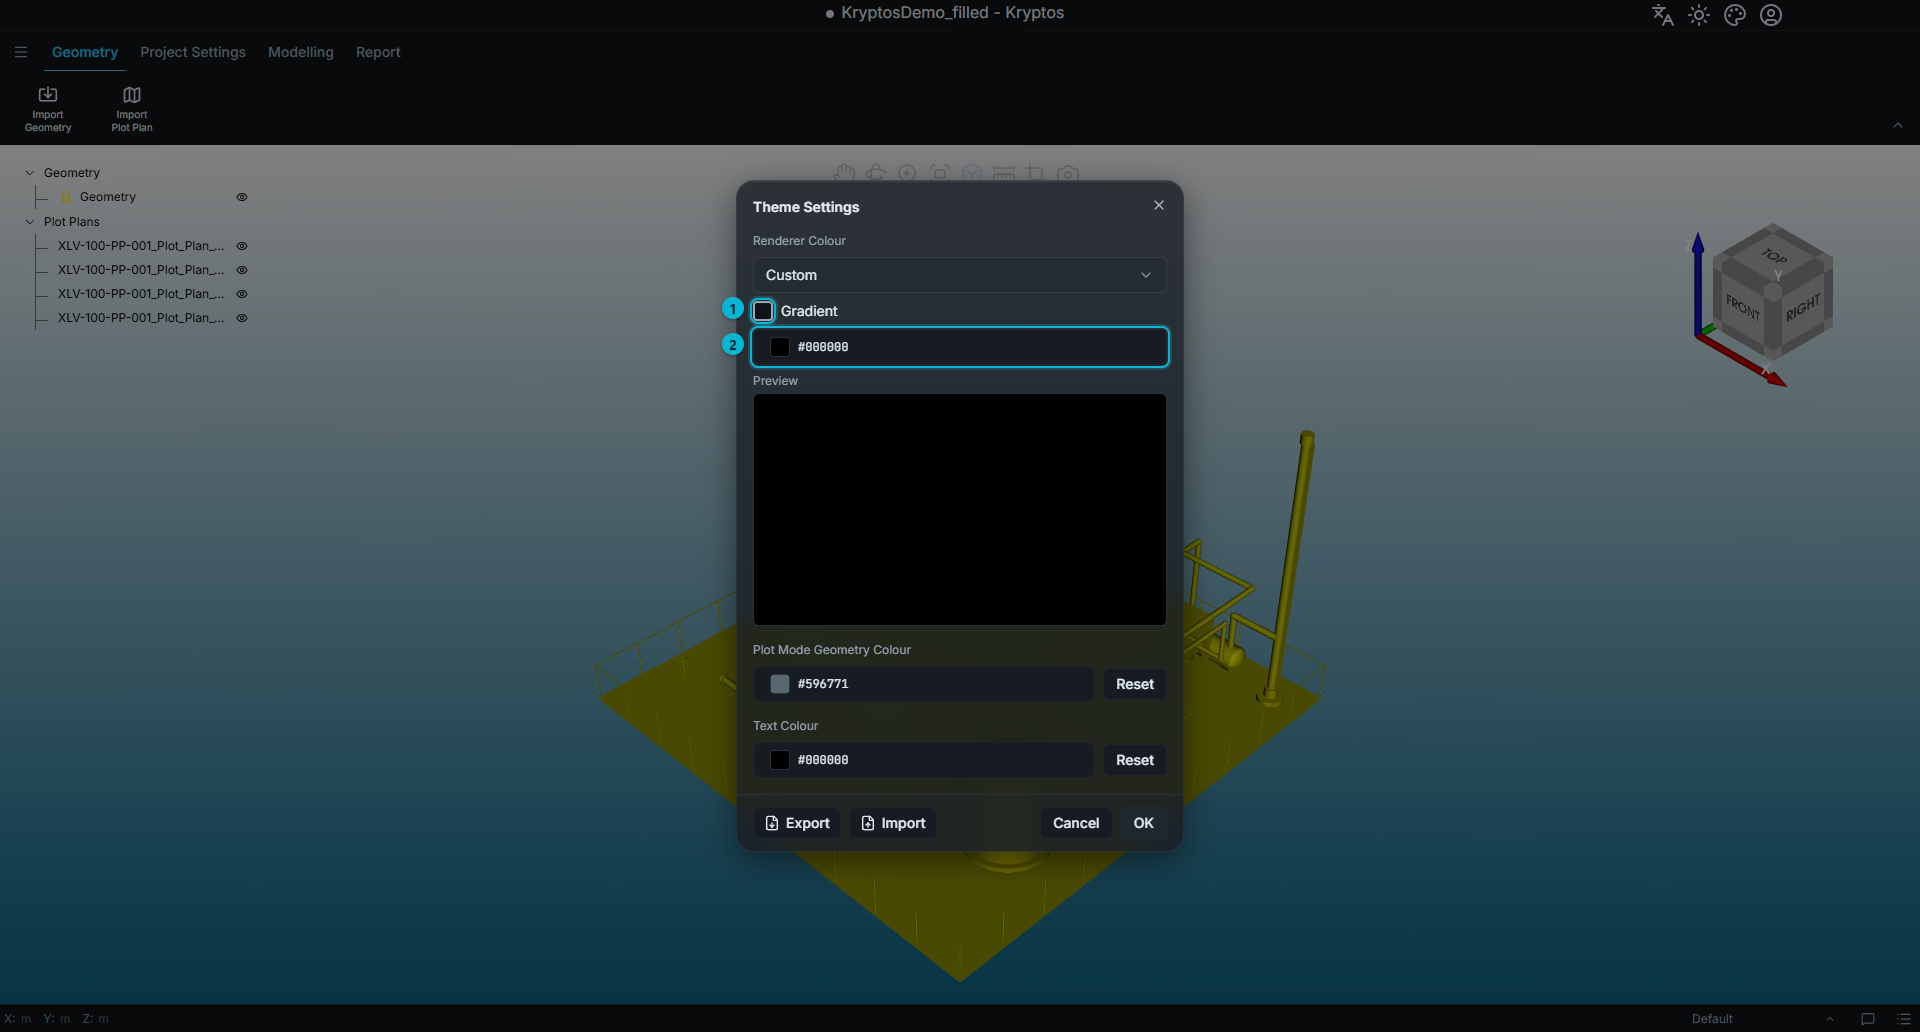
- Gradient — leave it unticked for one solid colour, or tick it to blend two colours.
- Colour — the solid background colour. Click to pick another.
Tick Gradient to blend two colours.
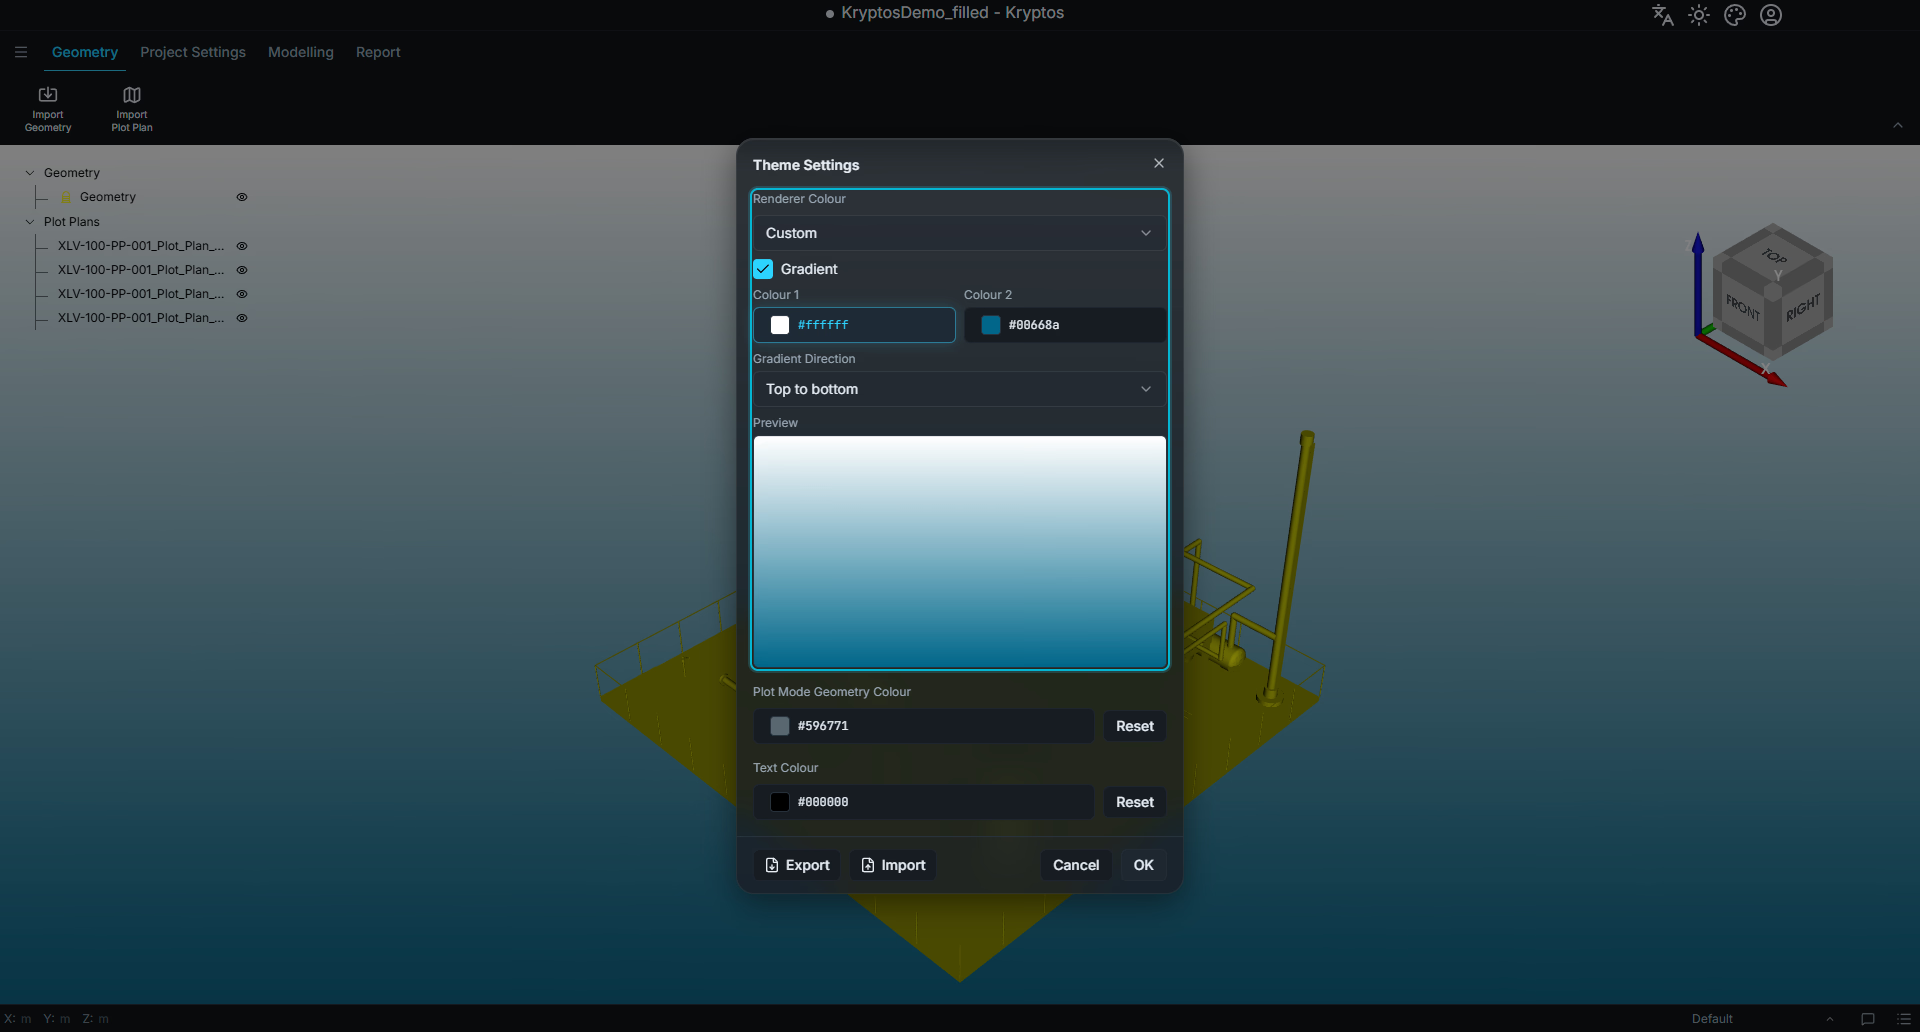
- Colour 1 and Colour 2 — the two colours of the blend. Click each one to pick it.
- Gradient Direction — which way the colours blend. You can choose Top to bottom, Bottom to top, Left to right, Right to left, or a blend that spreads from the centre out to the sides or out to the corners.
The Preview always shows exactly how your background will look.
When you switch back to Default, your custom colours are remembered for next time.
Plot Mode Geometry Colour
This is the colour of the imported geometry while you are in plot mode. Click the colour button to pick one. Reset puts back the default slate grey.
Outside plot mode the geometry keeps its own colours.
Text Colour
Text Colour sets the colour of text and icons drawn straight on the 3D view, such as the tree and its guide lines. Panels that have their own background, like the coverage table, keep their usual colour. Click the colour button to pick one, or Reset to go back to the default light grey.
The colour button opens the colour picker. Pick a colour from the spectrum, the basic colours, or by typing HSV, RGB or hex values.
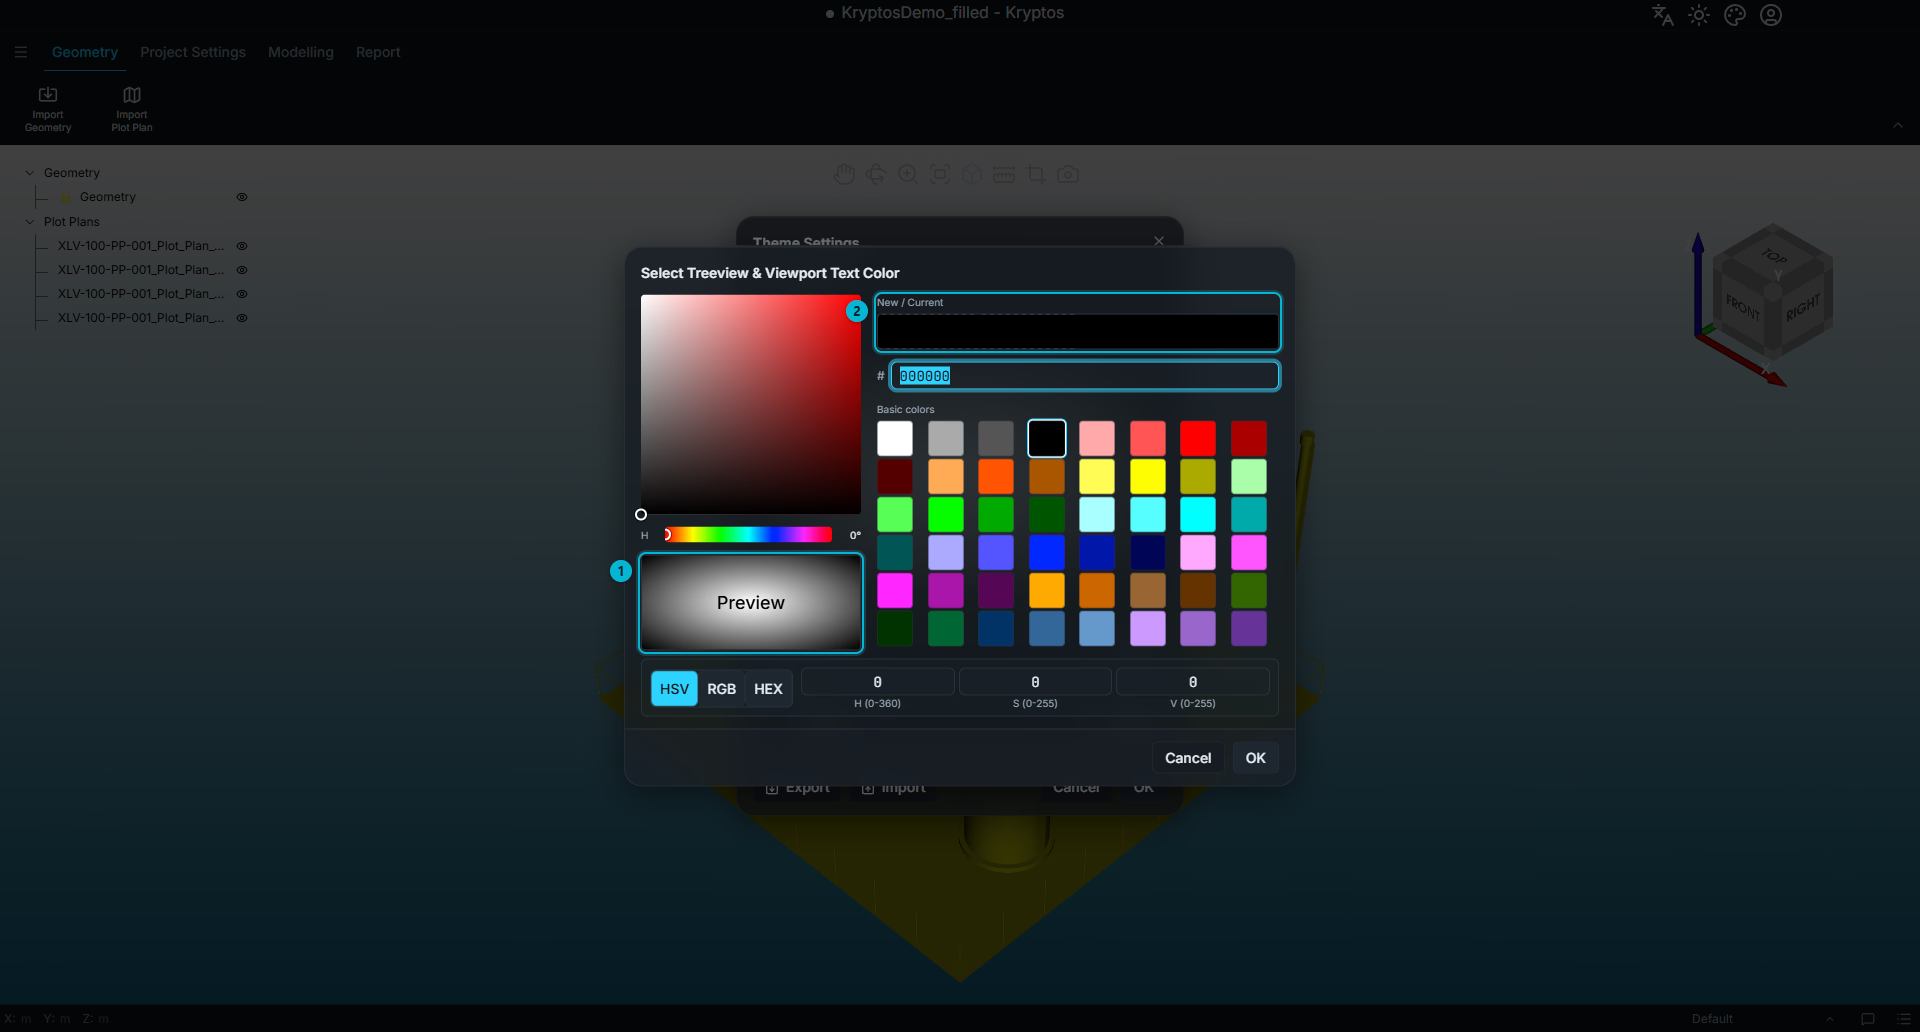
- Preview — your text colour shown over the background you have chosen, so you can check it is readable before applying it.
- New / Current — the colour you are picking beside the one you started with.
TIP
Pick a text colour that stands out against your background. Dark text on a dark background, for example, becomes hard to read.
Export and Import
Use Export to save the colours shown in the window to a file. This includes changes you have not applied yet. On another computer, use Import to load the file, then check the Preview and click OK to apply the colours.
This is a quick way to give everyone in your team the same colours.
Applying your changes
Nothing changes until you click OK. Cancel closes the dialog and keeps the colours you had.
Your choice is saved on this computer, so Kryptos opens with the same colours next time, for every project.
Related
- Project Settings — the settings that belong to a project, rather than to this computer
- Project Status, Views & Comments — saving views of the 3D window